Temps forts
Remplacements
Classement
Compositions
Statistiques
Stats joueurs
- Y. Asano 1
- S. Higashi 1
- Douglas Vieira 2
- Y. Asano 2
- T. Nakamura 1
- Y. Asano 1
- K. Konno 2
- T. Morishima 1
- K. Konno 3
- T. Uchida 2
- T. Morishima 2
- M. Shinada 2
- S. Sasaki 91
- T. Morishima 82
- H. Araki 10
- S. Sasaki 8
- T. Hara 8
- H. Araki 7
- T. Uchida 3
- Y. Nogami 2
- Y. Chajima 1
- K. Shibasaki 1
- T. Hara 3
- Y. Kashiwa 2
- Douglas Vieira 6
- T. Hara 5
- H. Araki 6
- K. Yajima 5
- Y. Kashiwa 2
- T. Uchida 2
- T. Hayashi 3
- S. Sasaki 77
- H. Araki 68
- S. Sasaki 70
- H. Kawabe 59
- H. Mita 2
- Y. Asano 2
Série en cours
Derniers matchs
-
Hiroyoshi Takayama arbitre principal1.90Moyenne de cartons par match sur 8 matchs arbitrés
- Hayato Shimizu quatrième arbitre
- Haruhiro Otsuka arbitre assistant
- Naoya Okawa arbitre assistant
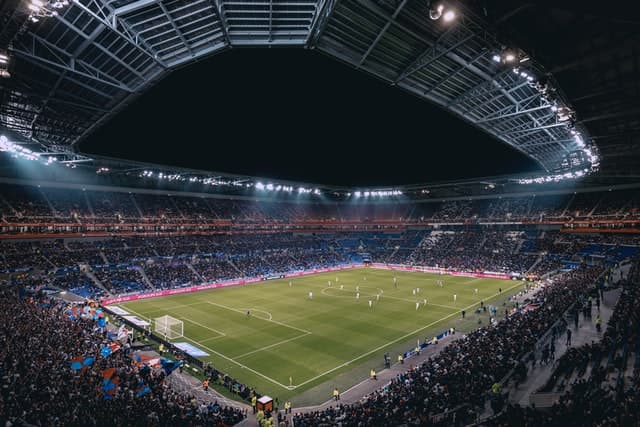
- Année de construction : 2000
- Surface : pelouse naturelle
- Capacité : 48955
- Affluence moyenne : 20744
- Affluence maximum : 44801
- % de remplissage : 41
Résultat du match Tokyo Sanfrecce
- Date 12 décembre 2020 06:00
- Compétition J League
- Saison 2020
- Phase Saison régulière - journée 31
- Affluence du match 9755
- Code TOK-SFR
- Zone Japon
- Equipe à domicile Tokyo
- Equipe à l'extérieur Sanfrecce Hiroshima
Quel est le résultat du match Tokyo Sanfrecce ?
Tokyo a gagné le match sur le score de 1-0
Quelles sont les compositions officielles du match Tokyo Sanfrecce ?
Tokyo : Entraînée par K. Hasegawa, l'équipe évolue en 4-3-3 : G. Hatano, H. Nakamura, D. Niwa, S. Kimura, T. Nakamura, T. Uchida, M. Shinada, H. Mita, K. Tagawa, Adaílton, T. Hara
Sanfrecce Hiroshima : De son côté, l'équipe entraînée par H. Jofuku, évolue en 3-4-3 : T. Hayashi, S. Sasaki, H. Araki, Y. Nogami, S. Higashi, T. Aoyama, H. Kawabe, Y. Chajima, T. Morishima, Douglas Vieira, Y. Asano
Quel est l'arbitre du match Tokyo Sanfrecce ?
Hiroyoshi Takayama arbitre cette rencontre
Où a lieu le match Tokyo Sanfrecce ?
Le match est au stade Ajinomoto Stadium à Chōfu
Quelle est la date et l'horaire du match Tokyo Sanfrecce ?
Match à suivre en live sur Footdirect le 12 décembre 2020, Coup d'envoi 06:00
-
-
13
G. Hatano
-
37
H. Nakamura
-
5
D. Niwa
-
47
S. Kimura
-
22
T. Nakamura
-
28
T. Uchida
-
44
M. Shinada
-
7
H. Mita
-
27
K. Tagawa
-
15
Adaílton
-
24
T. Hara
-
13
G. Hatano
-
-
1
T. Hayashi
-
19
S. Sasaki
-
23
H. Araki
-
2
Y. Nogami
-
24
S. Higashi
-
6
T. Aoyama
-
8
H. Kawabe
-
25
Y. Chajima
-
10
T. Morishima
-
9
Douglas Vieira
-
29
Y. Asano
-
1
T. Hayashi
-
-
 K. Hasegawa Entraîneur
-
K. Miyazaki
#19
- Milieu
-
T. Kodama
#1
- Gardien de but
-
K. Bangnagande
#49
- Défenseur
-
K. Yajima #23 - Attaquant72'
-
R. Omori
#34
- Défenseur
-
K. Konno #38 - Milieu58'
-
R. Hirakawa #40 - Milieu85'
-
-
-
H. Jofuku Entraîneur
-
 Y. Kashiwa #18 - Milieu55'
 -
A. Ibayashi
#3
- Défenseur
-
H. Matsumoto
#5
- Milieu
-
 K. Osako
#38
- Gardien de but
K. Osako
#38
- Gardien de but
-
K. Dohi
#26
- Milieu
-
T. Fujii
#50
- Milieu
-
 K. Shibasaki #30 - Milieu78'
-
- T. Nakamura 1
- Y. Asano 1
- K. Konno 2
- K. Konno 3
- T. Uchida 2
- H. Mita 2
- M. Shinada 2
- H. Kawabe 0% (0/2)
- Y. Nogami 79% (11/14)
- K. Konno 67% (6/9)
- D. Niwa 60% (6/10)
- H. Araki 59% (10/17)
- T. Uchida 3
- Y. Nogami 2
- T. Aoyama 2
- S. Higashi 2
- T. Aoyama 100% (2/2)
- Y. Nogami 75% (3/4)
- H. Araki 60% (9/15)
- Douglas Vieira 50% (6/12)
- Y. Asano 0% (0/6)
- K. Tagawa 0% (0/5)
- Y. Kashiwa 0% (0/4)
- T. Morishima 0% (0/4)
- Adaílton 0% (0/4)
- H. Kawabe 89% (59/66)
- T. Morishima 86% (49/57)
- S. Higashi 86% (42/49)
- S. Sasaki 24
- H. Kawabe 23
- T. Morishima 23
- Y. Asano 22
| # | Équipe | Pts | J | G | N | D | BP | BC | DIF | |
|---|---|---|---|---|---|---|---|---|---|---|
| 1 |
|
83 | 34 | 26 | 5 | 3 | 88 | 31 | 57 | |
| 2 |
|
65 | 34 | 20 | 5 | 9 | 46 | 42 | 4 | |
| 3 |
|
63 | 34 | 19 | 6 | 9 | 45 | 28 | 17 | |
| 4 |
|
60 | 34 | 18 | 6 | 10 | 46 | 37 | 9 | |
| 5 |
|
59 | 34 | 18 | 5 | 11 | 55 | 44 | 11 | |
| 6 |
|
57 | 34 | 17 | 6 | 11 | 47 | 42 | 5 | |
| 7 |
|
52 | 34 | 15 | 7 | 12 | 60 | 46 | 14 | |
| 8 |
|
48 | 34 | 13 | 9 | 12 | 46 | 37 | 9 | |
| 9 |
|
47 | 34 | 14 | 5 | 15 | 69 | 59 | 10 | |
| 10 |
|
46 | 34 | 13 | 7 | 14 | 43 | 56 | -13 | |
| 11 |
|
43 | 34 | 11 | 10 | 13 | 36 | 45 | -9 | |
| 12 |
|
39 | 34 | 10 | 9 | 15 | 47 | 58 | -11 | |
| 13 |
|
36 | 34 | 7 | 15 | 12 | 37 | 43 | -6 | |
| 14 |
|
36 | 34 | 9 | 9 | 16 | 50 | 59 | -9 | |
| 15 |
|
33 | 34 | 9 | 6 | 19 | 38 | 60 | -22 | |
| 16 |
|
28 | 34 | 7 | 7 | 20 | 48 | 70 | -22 | |
| 17 |
|
28 | 34 | 6 | 10 | 18 | 36 | 61 | -25 | |
| 18 |
|
27 | 34 | 6 | 9 | 19 | 29 | 48 | -19 |
| # | Équipe | Pts | J | G | N | D | BP | BC | DIF |
|---|---|---|---|---|---|---|---|---|---|
| 1 |
|
46 | 17 | 15 | 1 | 1 | 48 | 15 | 33 |
| 2 |
|
39 | 17 | 12 | 3 | 2 | 28 | 12 | 16 |
| 3 |
|
30 | 17 | 10 | 0 | 7 | 23 | 22 | 1 |
| 4 |
|
29 | 17 | 9 | 2 | 6 | 42 | 26 | 16 |
| 5 |
|
29 | 17 | 8 | 5 | 4 | 27 | 22 | 5 |
| 6 |
|
28 | 17 | 8 | 4 | 5 | 20 | 13 | 7 |
| 7 |
|
26 | 17 | 7 | 5 | 5 | 29 | 20 | 9 |
| 8 |
|
26 | 17 | 8 | 2 | 7 | 19 | 23 | -4 |
| 9 |
|
20 | 17 | 5 | 5 | 7 | 27 | 29 | -2 |
| 10 |
|
20 | 17 | 5 | 5 | 7 | 12 | 19 | -7 |
| 11 |
|
20 | 17 | 6 | 2 | 9 | 22 | 32 | -10 |
| 12 |
|
19 | 17 | 5 | 4 | 8 | 30 | 30 | 0 |
| 13 |
|
19 | 17 | 5 | 4 | 8 | 18 | 22 | -4 |
| 14 |
|
17 | 17 | 4 | 5 | 8 | 25 | 30 | -5 |
| 15 |
|
16 | 17 | 3 | 7 | 7 | 17 | 20 | -3 |
| 16 |
|
16 | 17 | 4 | 4 | 9 | 12 | 19 | -7 |
| 17 |
|
15 | 17 | 4 | 3 | 10 | 32 | 35 | -3 |
| 18 |
|
7 | 17 | 0 | 7 | 10 | 14 | 32 | -18 |
| # | Équipe | Pts | J | G | N | D | BP | BC | DIF |
|---|---|---|---|---|---|---|---|---|---|
| 1 |
|
39 | 17 | 12 | 3 | 2 | 27 | 19 | 8 |
| 2 |
|
37 | 17 | 11 | 4 | 2 | 40 | 16 | 24 |
| 3 |
|
33 | 17 | 10 | 3 | 4 | 30 | 16 | 14 |
| 4 |
|
32 | 17 | 10 | 2 | 5 | 26 | 24 | 2 |
| 5 |
|
30 | 17 | 10 | 0 | 7 | 28 | 22 | 6 |
| 6 |
|
27 | 17 | 7 | 6 | 4 | 24 | 20 | 4 |
| 7 |
|
27 | 17 | 8 | 3 | 6 | 25 | 34 | -9 |
| 8 |
|
24 | 17 | 7 | 3 | 7 | 17 | 16 | 1 |
| 9 |
|
23 | 17 | 6 | 5 | 6 | 24 | 26 | -2 |
| 10 |
|
22 | 17 | 6 | 4 | 7 | 17 | 17 | 0 |
| 11 |
|
21 | 17 | 6 | 3 | 8 | 22 | 29 | -7 |
| 12 |
|
20 | 17 | 4 | 8 | 5 | 20 | 23 | -3 |
| 13 |
|
19 | 17 | 5 | 4 | 8 | 25 | 29 | -4 |
| 14 |
|
19 | 17 | 5 | 4 | 8 | 20 | 29 | -9 |
| 15 |
|
18 | 17 | 5 | 3 | 9 | 27 | 33 | -6 |
| 16 |
|
13 | 17 | 3 | 4 | 10 | 16 | 28 | -12 |
| 17 |
|
13 | 17 | 3 | 4 | 10 | 16 | 35 | -19 |
| 18 |
|
11 | 17 | 2 | 5 | 10 | 17 | 29 | -12 |
| # | Équipe | Pts | J | G | N | D | BP | BC | DIF |
|---|---|---|---|---|---|---|---|---|---|
| 1 |
|
63 | 34 | 18 | 9 | 6 | 30 | 14 | 16 |
| 2 |
|
61 | 34 | 15 | 16 | 2 | 26 | 8 | 18 |
| 3 |
|
52 | 34 | 13 | 13 | 4 | 20 | 18 | 2 |
| 4 |
|
49 | 34 | 13 | 10 | 5 | 21 | 16 | 5 |
| 5 |
|
49 | 34 | 10 | 19 | 2 | 16 | 11 | 5 |
| 6 |
|
48 | 34 | 11 | 15 | 3 | 22 | 20 | 2 |
| 7 |
|
48 | 34 | 10 | 18 | 5 | 23 | 14 | 9 |
| 8 |
|
46 | 34 | 10 | 16 | 3 | 22 | 23 | -1 |
| 9 |
|
44 | 34 | 11 | 11 | 6 | 25 | 24 | 1 |
| 10 |
|
44 | 34 | 10 | 14 | 5 | 20 | 24 | -4 |
| 11 |
|
44 | 34 | 9 | 17 | 5 | 30 | 24 | 6 |
| 12 |
|
38 | 34 | 6 | 20 | 3 | 13 | 18 | -5 |
| 13 |
|
37 | 34 | 8 | 13 | 6 | 19 | 22 | -3 |
| 14 |
|
37 | 34 | 8 | 13 | 9 | 17 | 25 | -8 |
| 15 |
|
33 | 34 | 7 | 12 | 8 | 14 | 23 | -9 |
| 16 |
|
33 | 34 | 6 | 15 | 7 | 13 | 22 | -9 |
| 17 |
|
33 | 34 | 3 | 24 | 4 | 11 | 18 | -7 |
| 18 |
|
25 | 34 | 4 | 13 | 8 | 15 | 33 | -18 |